


I’ve seen some really cool NewTab front pages for featured on github for r/unixporn LIKE
The Design
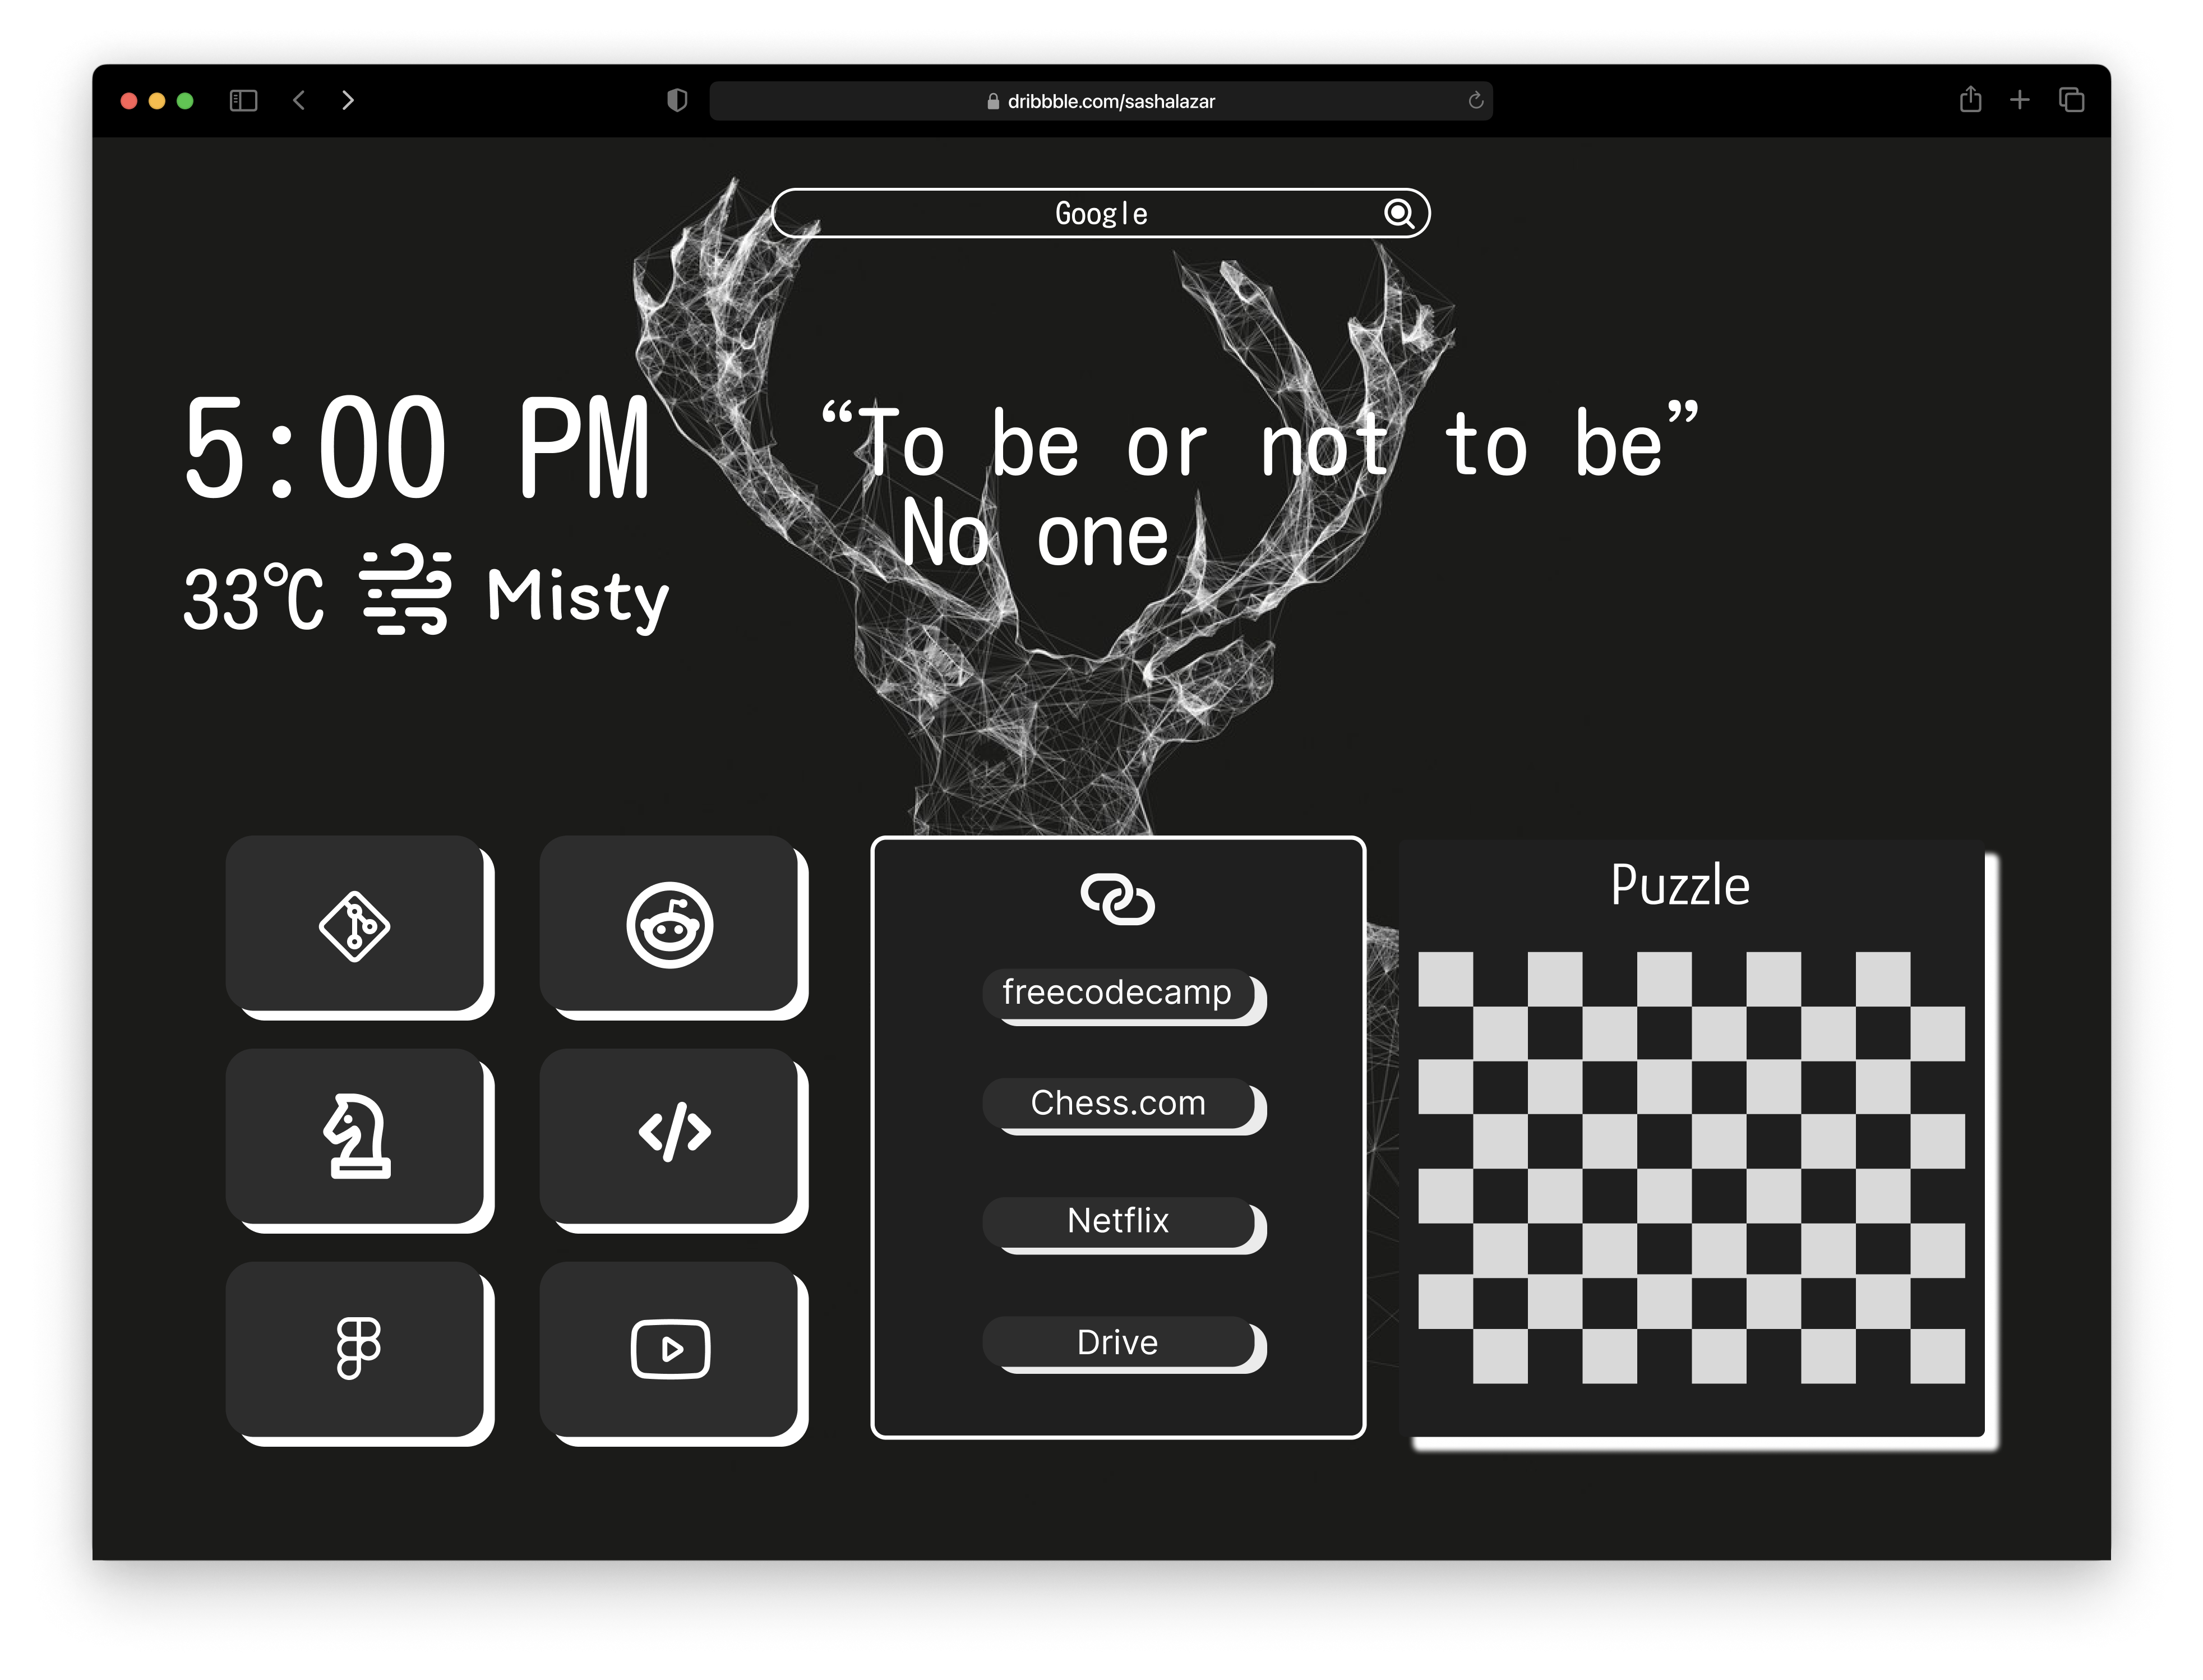
Simple Features
- AutoScrapped Quotes
- Weather
- Chess Puzzle from lichess API
Component BreakDown
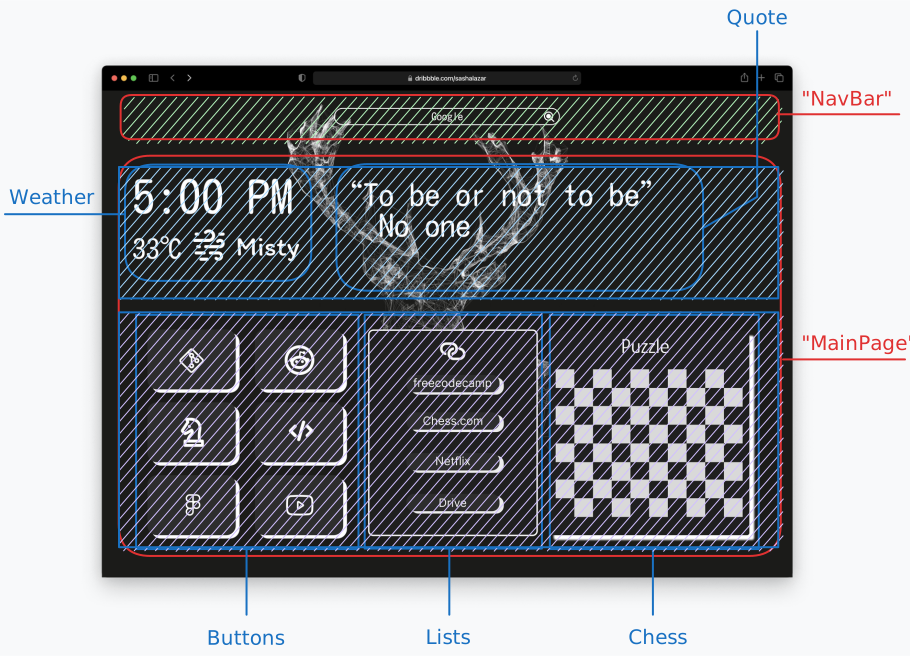 %%🖋 Edit in Excalidraw, and the dark exported image%%
Make the Basic Structure of the App
NavBar
This one is actually oddly simple, as the basic structure of the navbar is only based on GoogleSearch being hooked too the input, some border style and we are done
import './Navbar.css'

function Navbar() {
  return (
  <div className='nav_container'>
     <nav className='nav_bar'> <input className="search_bar" type="?" placeholder=' Google Search '/>  </nav>
  </div>
  );
}

export default Navbar;
CSS
.nav_container {
    display: flex;
    justify-content: center;
    margin: 30px 0 30px 0;
}

.search_bar{
    border: 3px solid cyan;
    width: 300px;
    height: 30px;
    border-radius: 20px;
    text-align: center;
    font-size: large;
    background-image: url("searchIcon.svg");
    background-repeat: no-repeat;
    background-size: contain;
    background-position: right;

}
Input entry to Google search
Simple HTML was just applied !
 <form action="http://www.google.com/search" method="get">
	<input className="search_bar" name="q" type="text" placeholder=' Google Search '/>
</form>
The Action Attribute
The action attribute defines the action to be performed when the form is submitted.
Usually, the form data is sent to a file on the server when the user clicks on the submit button.
In the example below, the form data is sent to a file called “action_page.php”. This file contains a server-side script that handles the form data:
Notes on GET:
- Appends the form data to the URL, in name/value pairs
- NEVER use GET to send sensitive data! (the submitted form data is visible in the URL!)
- The length of a URL is limited (2048 characters)
- Useful for form submissions where a user wants to bookmark the result
- GET is good for non-secure data, like query strings in Google
Notes on POST:
- Appends the form data inside the body of the HTTP request (the submitted form data is not shown in the URL)
- POST has no size limitations, and can be used to send large amounts of data.
- Form submissions with POST cannot be bookmarked
Logic of Za URL forms (Google)
 %%🖋 Edit in Excalidraw, and the dark exported image%%

Making a theme generated background paper
Not possible ? Found BGJar to for really nice background patterns!
Implementing a Working clock
An Updating Clock and “useEffect” - ChatGPT
To implement an updating clock in React, you can follow these steps:
- Create a new React component for the clock. For example, you can name it “Clock”.
- In the component, initialize a state variable to hold the current time. This can be done using the
useStatehook.
   import React, { useState } from "react";

   const Clock = () => {
     const [time, setTime] = useState(new Date());

     return (
       <div>{time.toLocaleString()}</div>
     );
   };

export default Clock;-
Next, you need to update the time every second. This can be achieved using the
setIntervalfunction. At the same time, you should handle the cleanup of the interval when the component unmounts. To do this, you can use theuseEffecthook.import React, { useState, useEffect } from "react"; const Clock = () => { const [time, setTime] = useState(new Date()); useEffect(() => { const timerID = setInterval(() => setTime(new Date()), 1000); return () => { clearInterval(timerID); }; }, []); return ( <div>{time.toLocaleString()}</div> ); }; export default Clock; -
Finally, you can render the
Clockcomponent in your main app component or any other component where you want to display the clock.
   import React from "react";
   import Clock from "./Clock";

   const App = () => {
     return (
       <div>
         <h1>Current Time:</h1>
         <Clock />
       </div>
     );
   };

   export default App;
With these steps, the clock component will update the displayed time every second while using React’s state and hooks.
The useEffect
The useEffect hook is a built-in hook in React that allows you to perform side effects in functional components. Side effects are any code that needs to be executed outside the normal flow of the component, such as fetching data, subscribing to events, or manually modifying the DOM.
The useEffect hook takes two parameters: a callback function and an optional dependency array. The callback function is executed after the component renders, and it can return a cleanup function that will be executed before the component is unmounted or re-rendered. The dependency array specifies the values that the effect depends on, and it allows you to control when the effect should run or be skipped.
Here’s an example of using useEffect to fetch data from an API:
import React, { useEffect, useState } from "react";

function MyComponent() {
  const [data, setData] = useState([]);

  useEffect(() => {
    // Fetch data from API
    fetch("https://api.example.com/data")
      .then((response) => response.json())
      .then((data) => setData(data));
  }, []);

  return (
    <div>
      {data.map((item) => (
        <p key={item.id}>{item.name}</p>
      ))}
    </div>
  );
}
In this example, the effect will run only once, immediately after the component renders for the first time, because the dependency array is empty. If you specify a dependency array with values, the effect will run whenever any of those values change.
useEffect is a powerful tool for managing side effects in functional components and helps to keep the logic of the component organized and easy to understand.
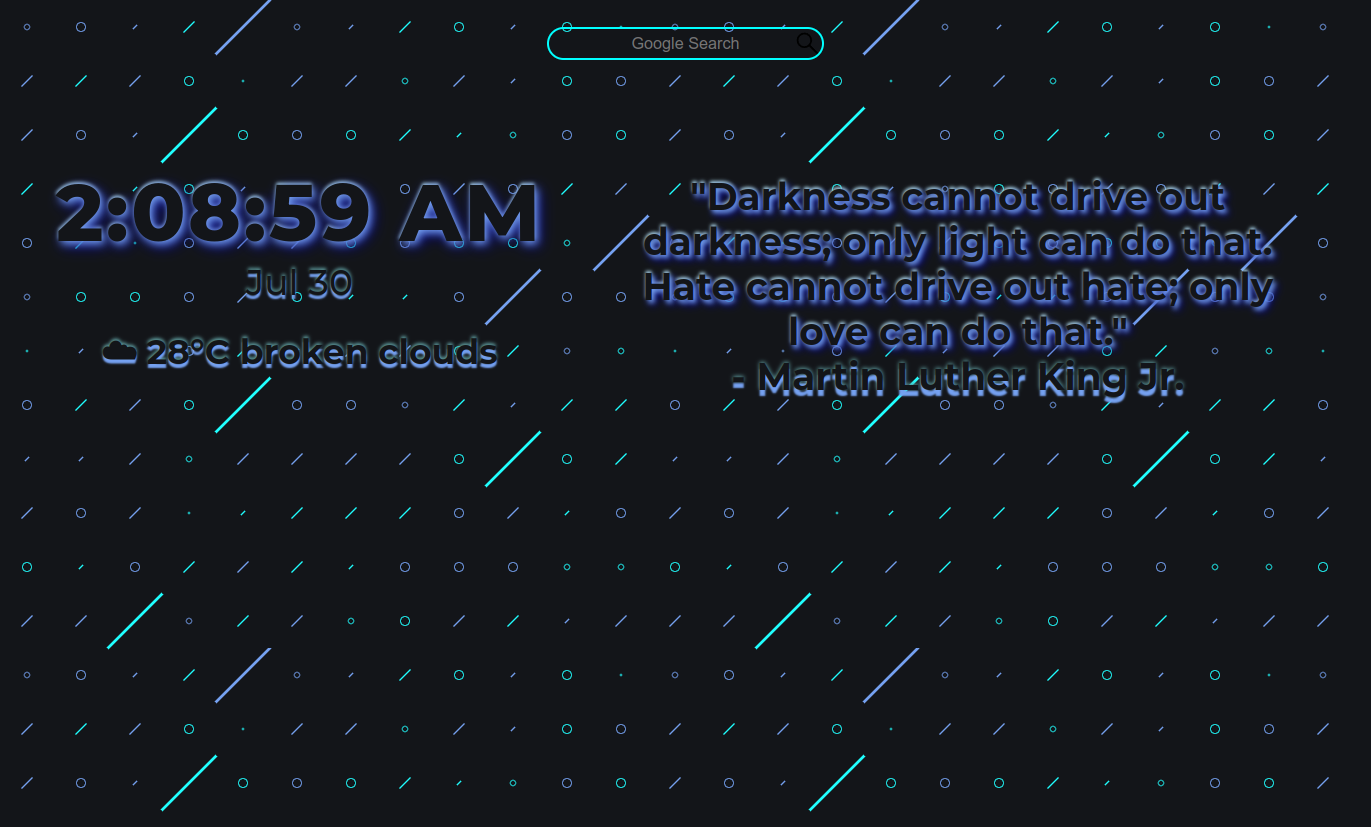
The actual progress is a bit different due to the different styles give to this !
Hooking up api
Now that we have the overall structure built, We can start to implement the API that take the data from the respective API of
- Quotable
- OpenWeather The general code for getting the JSON from an API is;#snippet
    const url = "API url"

    const [data, setData] = useState(["List/Data set with default data to prevent errors"]);
    async function fetchInfo(){
        const res = await fetch(url);
        const d = await res.json();
        return setData(d);
        }
    useEffect(()=>{
        fetchInfo();
    }, [])
The interesting this that Javascript is an async language, the thing doesn’t wait for one code to execute and goes on to the next, Meaning calling to retreive the data through
<h1 className='qotd base'> {data[0]["content"]} <br></br> <span className='author'> {data[0]["author"]} </span> </h1>It would give an error if it weren’t for the default values of data that we gave in the useState
BottomSection
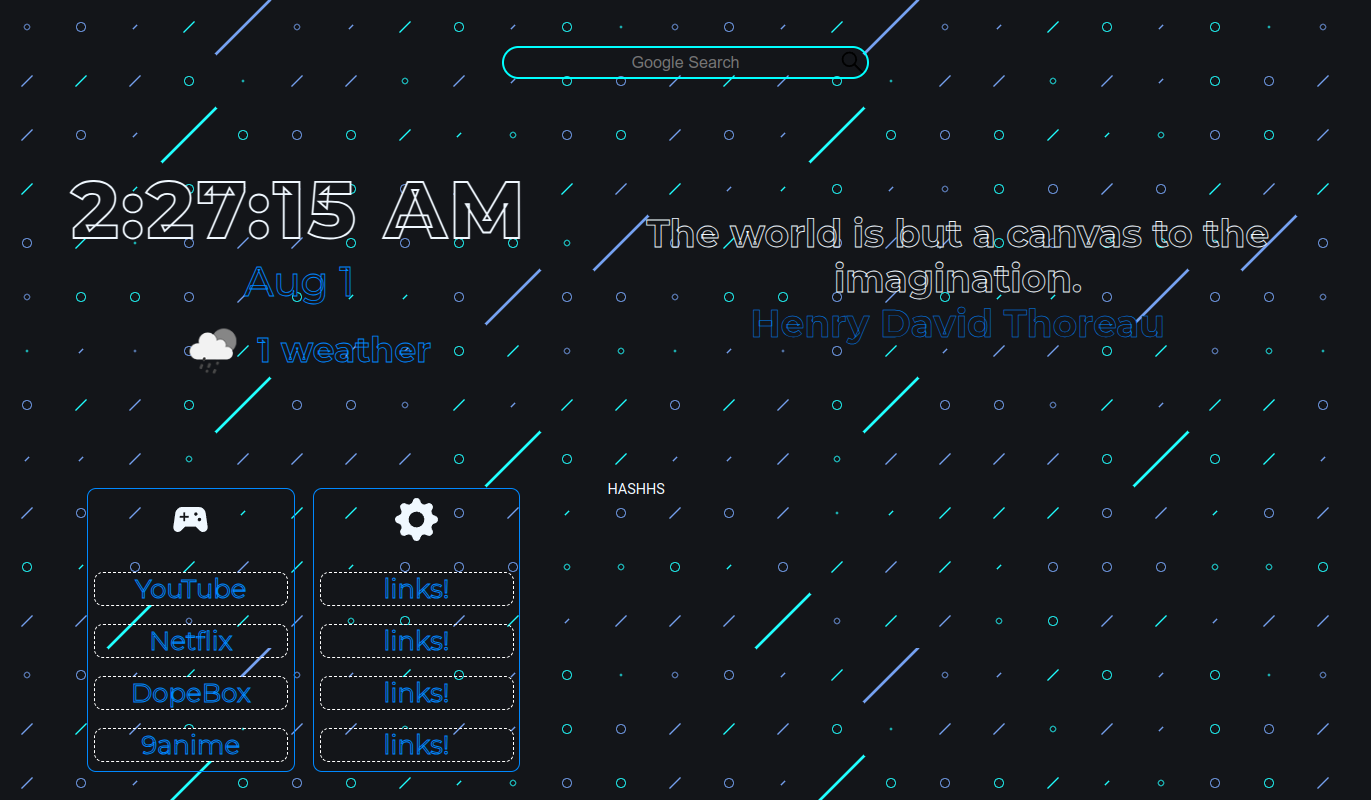
Just a list of links for ease of use the JSX and CSS of which are;
In order to get the icons, using react-icons was a blessing !
function Links(){
    return (
        <div className='link_section'>
            <div classname='link_box1'>
                <ul className='link_list'>
                    <span className='icon'><MdSportsEsports size={"3em"}/></span>
                    <li className='link_item'><a className='links' href=""> YouTube </a></li>
                    <li className='link_item'><a className='links' href=""> Netflix </a></li>
                    <li className='link_item'><a className='links' href=""> DopeBox </a></li>
                    <li className='link_item'><a className='links' href=""> 9anime </a></li>
                </ul>
            </div>
            <div classname='link_box2'>
                <ul className='link_list'>
                    <span className='icon'><BsFillGearFill size={"3em"}/></span>
                    <li className='link_item'><a className='links' href=""> links! </a></li>
                    <li className='link_item'><a className='links' href=""> links! </a></li>
                    <li className='link_item'><a className='links' href=""> links! </a></li>
                    <li className='link_item'><a className='links' href=""> links! </a></li>
                </ul>
            </div>
        </div>
    )
}
Result;
Adding a GitHubCalendar
So first we just need to install the component so that we can import it
npm install react-github-calendarThen add it to your respective Application
import GitHubCalendar from 'react-github-calendar'

function App(){
	return(// You apps
		<GitHubCalendar username='USERNAME' blockSize={24} style={{fontFamily:'Montserrat', margin:'3vh', fontWeight:'600', borderColor:'white'}} theme={colourTheme} transformData={Filter}/>
	)
}
This function gives an entire graph for the whole year, but this can be changed by using filtering and transformData
Filtering the last 6 months
const selectLastHalfYear = contributions => {
  const currentYear = new Date().getFullYear();
  const currentMonth = new Date().getMonth();
  const shownMonths = 6;

  return contributions.filter(activity => {
    const date = new Date(activity.date);
    const monthOfDay = date.getMonth();

    return (
      date.getFullYear() === currentYear &&
      monthOfDay > currentMonth - shownMonths &&
      monthOfDay <= currentMonth
    );
  });
};
transformData={} runs a function on an array of data (contributions), then we can have a constant for the current year and month. Using this data we can filter it out
filter() is a function which runs over the items of the data returning the satisfied data. Then checks if
- The year of data === This year
- monthofData is greater than the previous 6 months
- monthofData is less than or the same as the currentMonth
Responsive_Design
Learn it if you need to ! The whole idea about making a “responsive” design was to hook up values window size to the scale of the components Measurement values
Finale
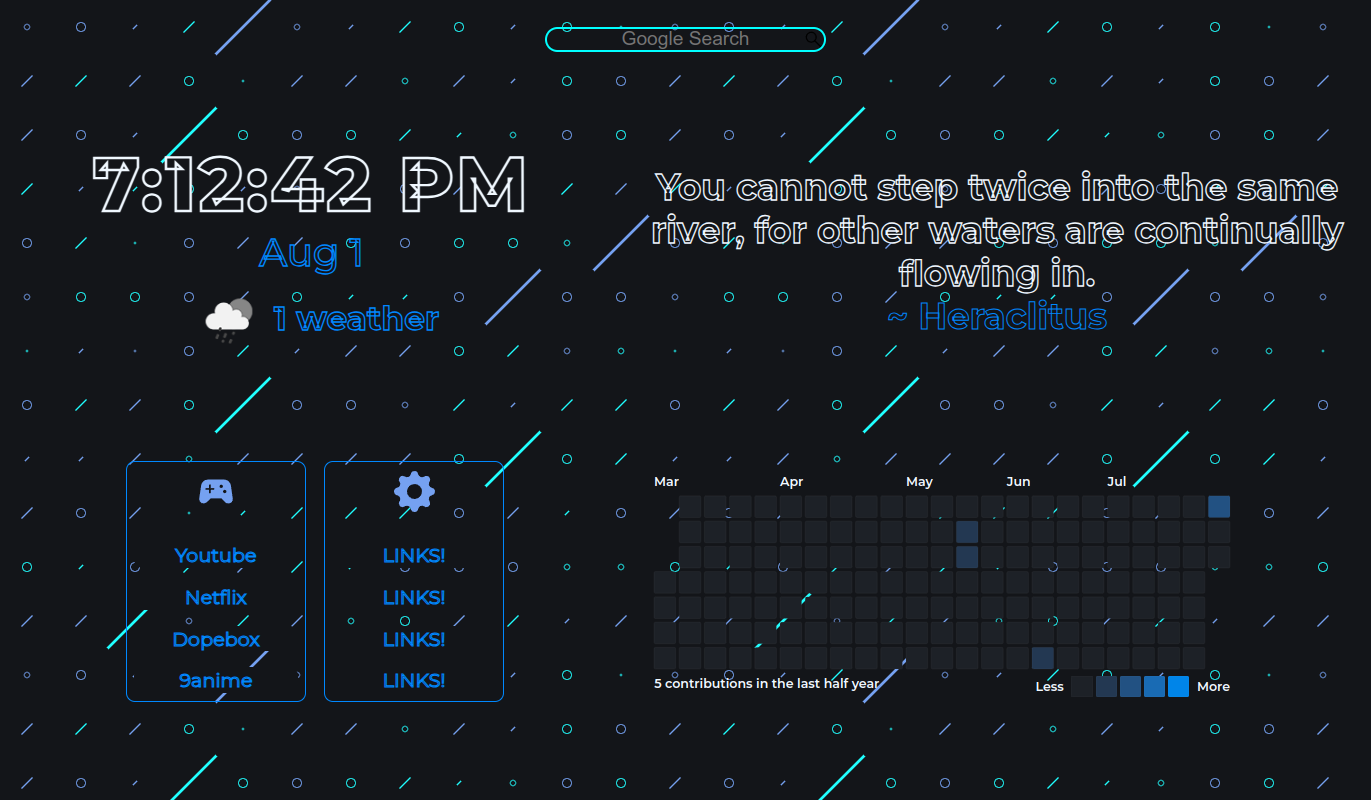
Implementing the Loop for links
We can go over the key values of an object by
const link1 = [{
        name:"YouTube" ,
        link:"https://youtube.com/"
    },{
        name:"DopeBox" ,
        link:"https://dopebox.to/"
    },{
        name:"Netflix" ,
        link:"https://netflix.com/"
    },{
        name:"9anime" ,
        link:"https://netflix.com/"
    },]

  let Link1 = linkList1.map((obj)=>{
        return (<li className='link_item'><button className='links' onClick={()=>{window.open(obj.link)}}> {obj.name} </button></li>)
})Deployment
Simply followed this incredible guide! react-gh-pages
Definitely need to learn how to properly, easily make responsive design.. Maybe by using a framework?
Task Board
Done
- Make NewTabReact Responsive#task [completion:: 2023-08-01]
- Transform this into loops by taking data from a list of links#task [completion:: 2023-08-04]
- QOTD and Weather API to NewTabReact#task [completion:: 2023-07-31]
- A safe and easy way to import API keys to the public repo
- The mobile UI is bad! need to fix it#task
- Make the search icon an object instead of background#task [completion:: 2023-08-06]
Problems
- Fixing the App for best practices!#task